


Small Kitchen Coffee Bar Ideas Using a Bakers Rack: A 2026 Guide

Summary
Transforming a small kitchen into a high-performance coffee station is most effectively achieved by utilizing a vertical bakers rack, which maximizes square footage while providing dedicated zones for brewing, storage, and preparation. By prioritizing structural stability, electrical safety, and moisture protection, apartment and condo dwellers can create a professional-grade coffee bar that balances aesthetic appeal with 2026 smart home functionality.
Key Takeaways
- Vertical Efficiency: Utilize the height of a bakers rack to move coffee appliances off limited counter space, creating a dedicated "coffee zone" in compact kitchens.
- Structural Safety: Always place heavy espresso machines on the lowest or most reinforced shelf to maintain a low center of gravity and prevent tip-over risks.
- Zonal Organization: Organize your rack into four distinct functional zones—wet, dry, hot, and service—to streamline your morning workflow.
- Surface Protection: Use food-safe sealants or silicone mats to protect wood and metal surfaces from the inevitable steam and spills of daily brewing.
- Smart Integration: Incorporate smart plugs and USB-C charging stations to align your coffee bar with modern 2026 home automation trends.
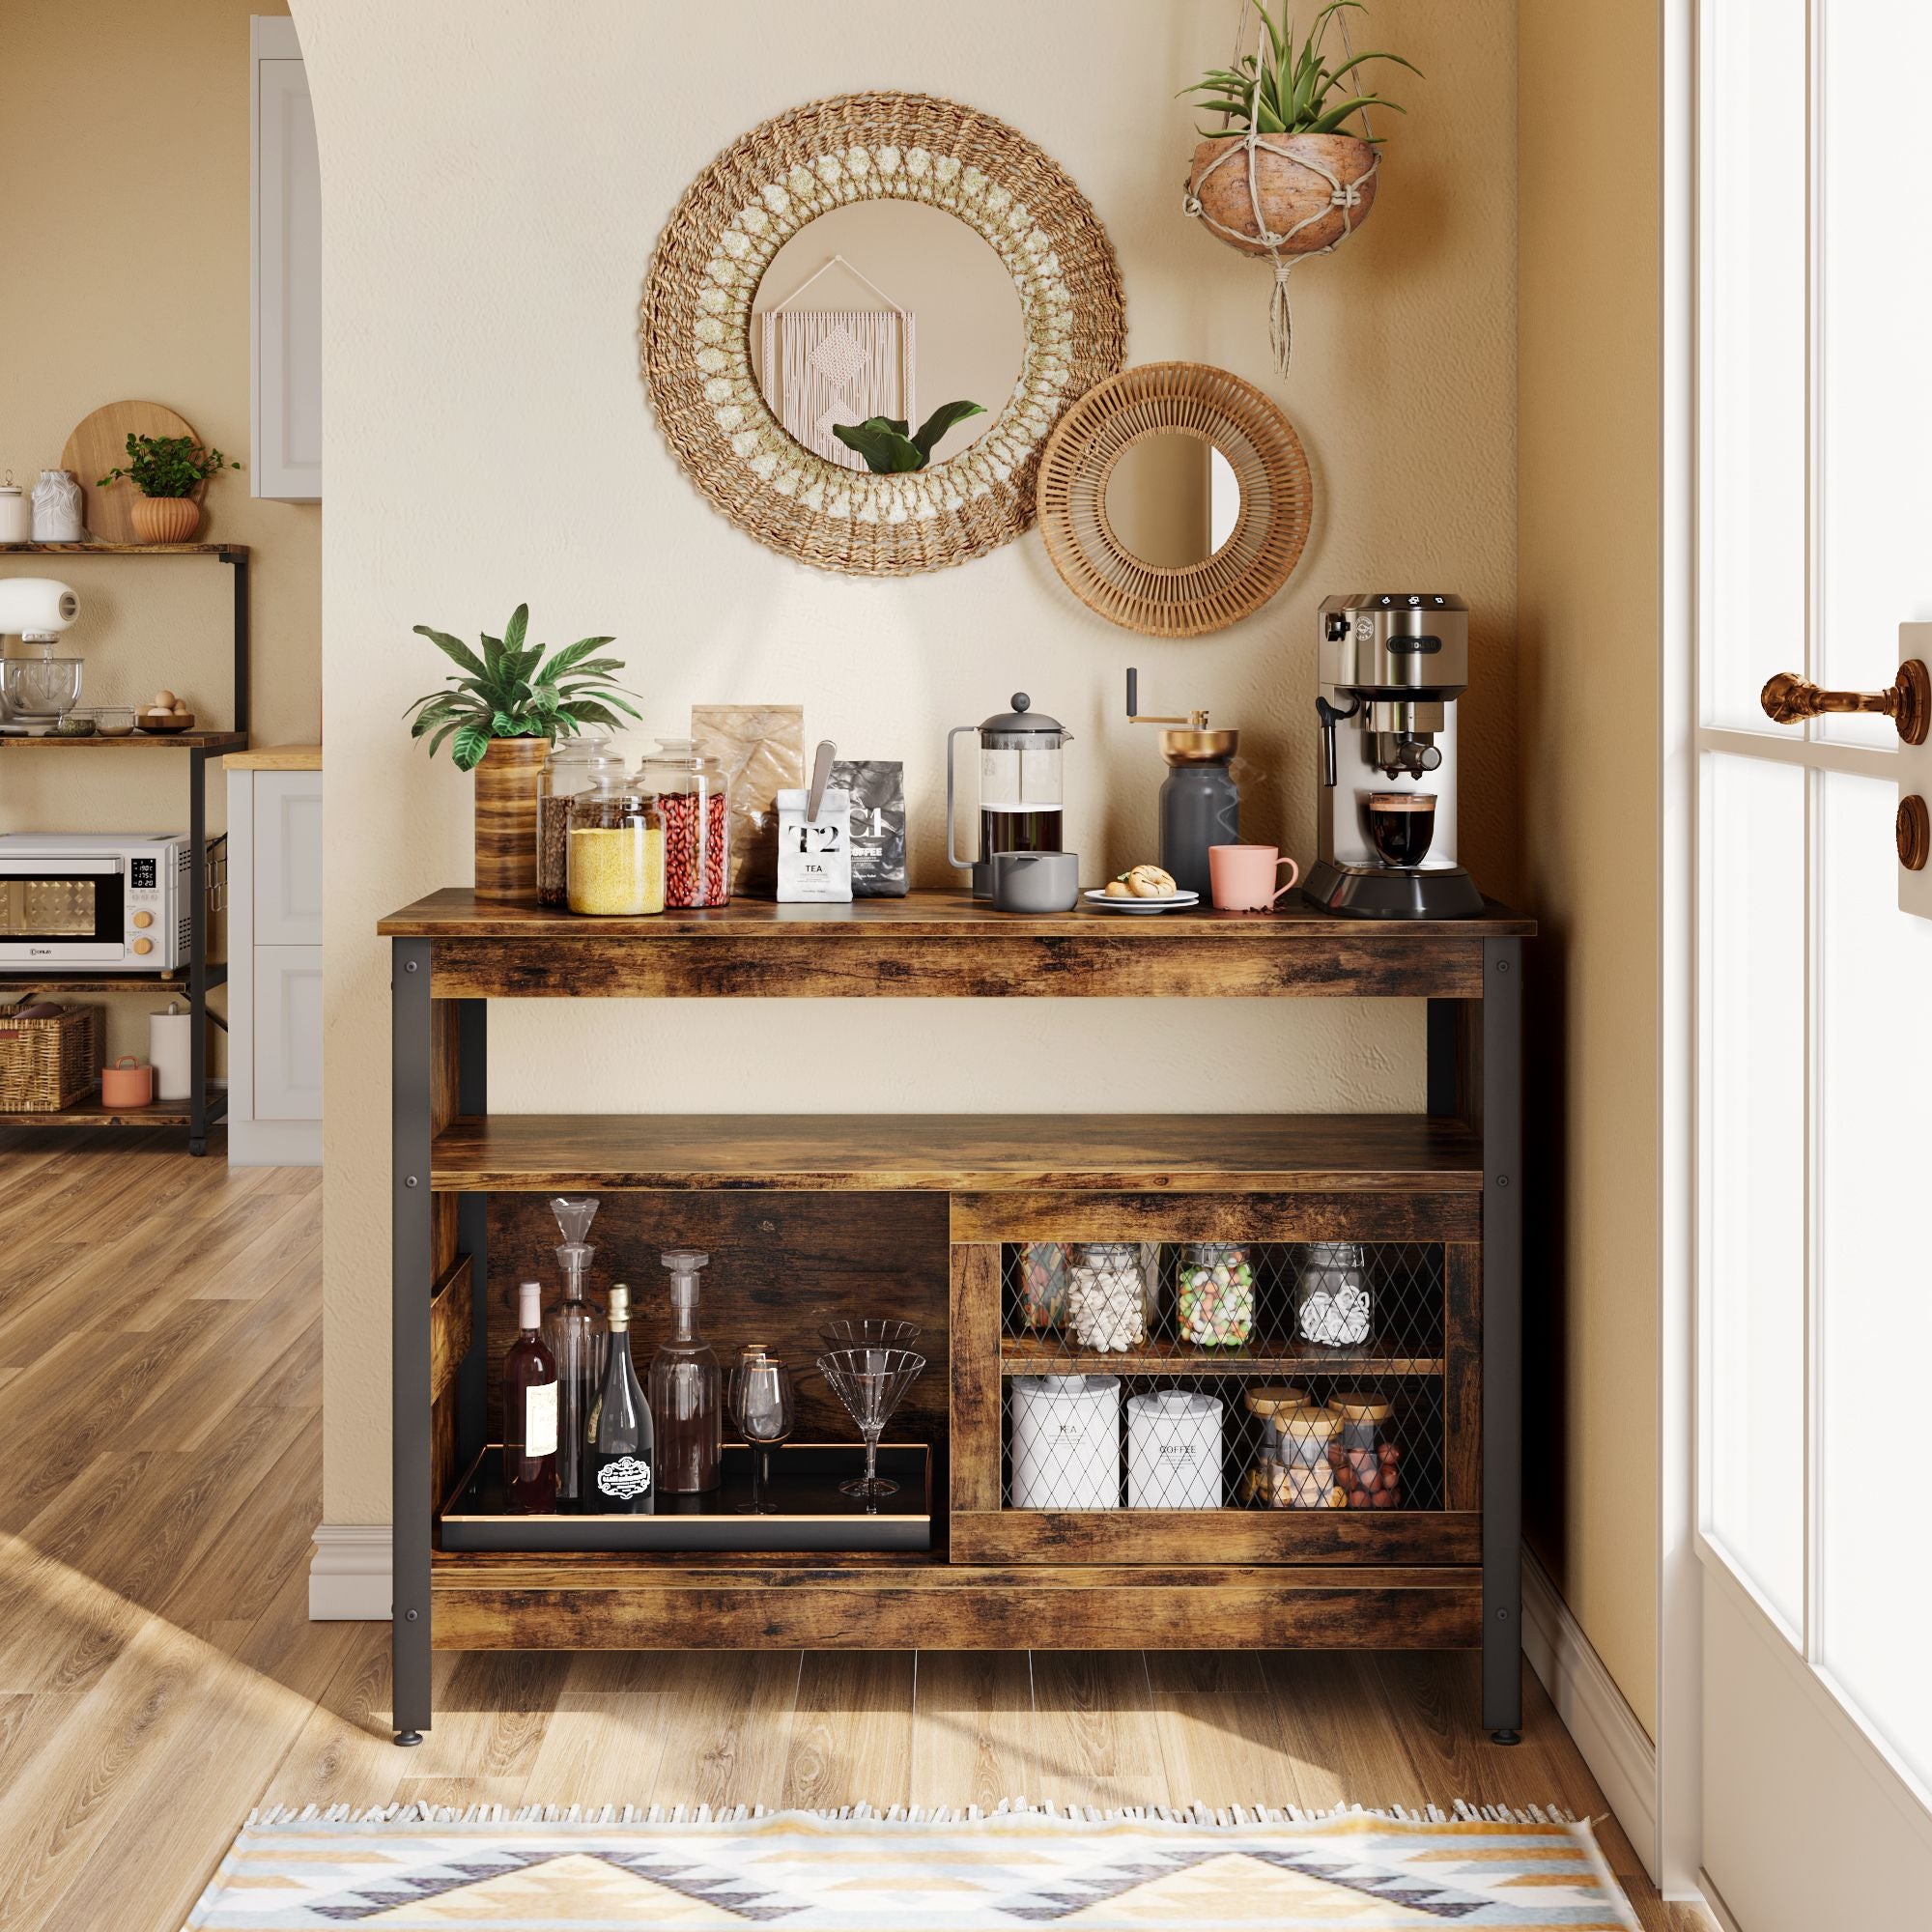
Why a Bakers Rack is the Ultimate Small Kitchen Coffee Station
In the evolving landscape of 2026 home design, the "coffee bar station" has transitioned from a luxury to a functional necessity, especially for those navigating the constraints of apartment or condo living. A bakers rack serves as the ideal foundation for this transformation because it leverages "modular manufacturing" principles—offering a multi-functional piece of furniture that can adapt as your coffee hobby grows. Unlike traditional cabinets, a bakers rack with built-in power outlets provides the open airflow necessary for heat-generating appliances while offering the vertical storage needed to house everything from grinders to artisanal bean collections.
The shift toward compact, high-efficiency living has made small kitchen organization tips more relevant than ever. A bakers rack doesn't just hold items; it organizes them vertically, freeing up precious counter space for meal preparation. This approach is particularly effective for creating creative DIY coffee bar ideas that look professional without requiring a full kitchen remodel.
Expert Insight: This recommendation assumes a standard kitchen layout where counter space is the primary bottleneck. A bakers rack is prioritized over enclosed cabinets for its superior heat dissipation and visibility, which are critical for high-use appliances like espresso machines and electric kettles.
How to Choose the Right Bakers Rack for Your Coffee Bar
Selecting the right foundation is critical for both safety and functionality. When you browse all bakers racks, you will notice a wide variety of materials and weight capacities. For a coffee station, the structural integrity of the rack is paramount.
Material and Construction
Industrial-style racks featuring welded steel frames and high-density composite wood shelves are generally preferred for coffee stations. These materials offer the necessary rigidity to support heavy espresso machines, which can weigh between 20 and 40 pounds. A multi-functional bakers rack with storage often includes reinforced middle shelves specifically designed for heavier kitchen appliances.
Weight Distribution and Stability
A common mistake in coffee bar setup is placing the heaviest machine on the top shelf for better visibility. From an engineering perspective, this is a significant safety hazard. To ensure stability, follow these guidelines:
- Lower the Center of Gravity: Place your heaviest items (espresso machines, large bags of beans, or water carboys) on the lowest possible shelf.
- Shelf Reinforcement: If using a wire rack, consider adding a solid shelf liner or a reinforcement plate to prevent the machine's feet from slipping through. Note: While many industrial-style shelves are rated for 50–100 lbs, this is a "static load" typical of reinforced composite or steel; always verify the specific weight limit in your product manual before installation.
- Anti-Tip Measures: Even if you are a renter, stability is non-negotiable. The U.S. Consumer Product Safety Commission (CPSC) emphasizes furniture stability through standards like ASTM F2057-23. Use furniture straps or weighted bases to secure your rack.

Essential Organization Zones for a High-Performance Coffee Station
To create a workflow that rivals your favorite local café, organize your bakers rack into four distinct "zones." This commercial-inspired approach ensures that everything you need is exactly where it should be.
The Hot Zone (Brewing)
This is the heart of your station. It should be located at waist height (typically the main shelf of the bakers rack) to ensure ergonomic comfort. This zone houses your espresso machine or drip brewer. Rule of Thumb: Ensure there is at least 4–6 inches of clearance above the machine to allow for steam dissipation and easy water reservoir refilling.
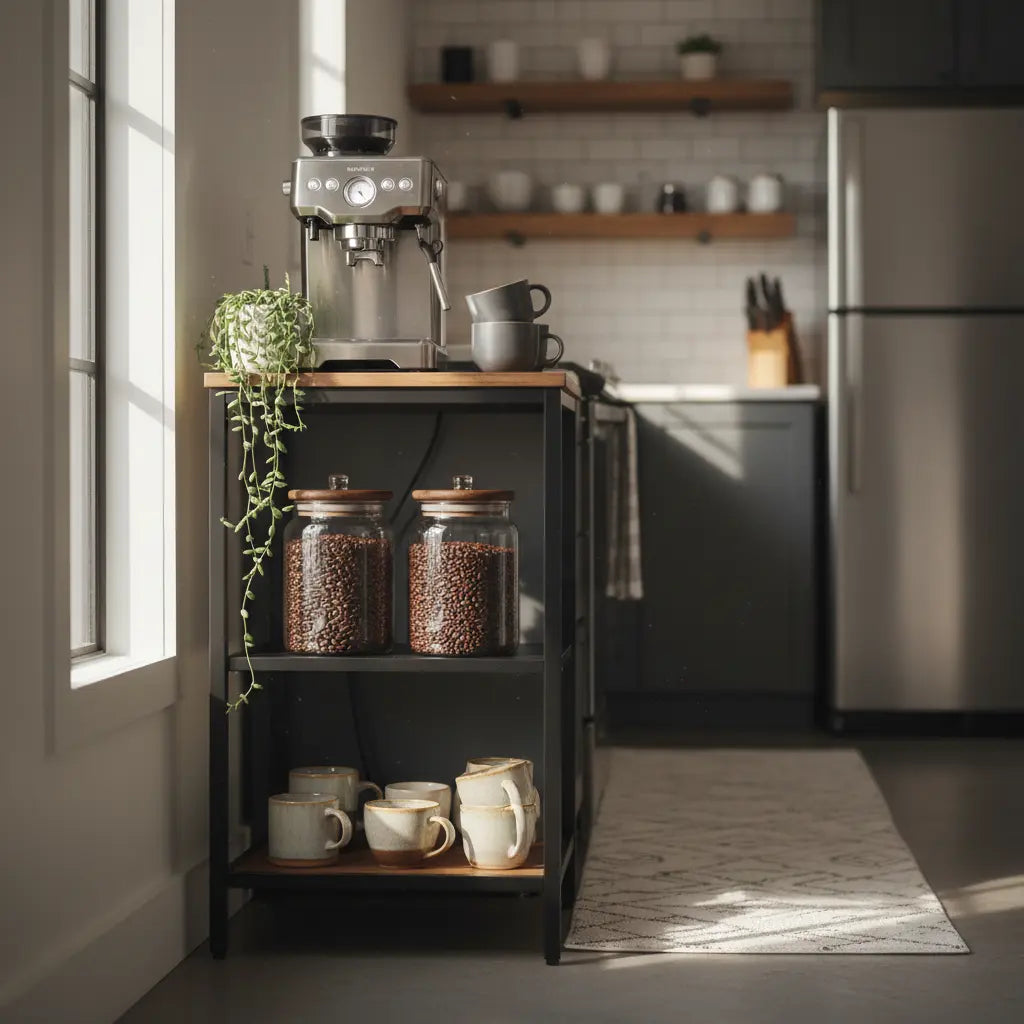
The Dry Zone (Grinding and Storage)
Located adjacent to the hot zone, this area is for your coffee grinder, scales, and bean canisters. Keeping your grinder and beans together minimizes the "coffee dust" trail. Use airtight, UV-protected glass or ceramic jars to maintain bean freshness.
The Wet Zone (Water and Cleaning)
If your bakers rack isn't near a sink, dedicate a section to water management. This includes a filtered water pitcher and a small tray for used spoons. For 2026 setups, many enthusiasts are incorporating small, hidden water carboys with electric pumps for a "plumbed-in" feel.
The Service Zone (Mugs and Accessories)
The upper shelves are perfect for the service zone. This is where you display your mug collection and stirrers. Use S-hooks on the side of the rack to hang mugs, saving shelf space for larger items like carafes.
| Zone | Primary Items | Recommended Shelf Level |
|---|---|---|
| Hot Zone | Espresso machine, Kettle, Drip brewer | Main (Waist-high) |
| Dry Zone | Grinder, Scales, Beans, Pods | Main or Mid-shelf |
| Wet Zone | Water pitcher, Drip tray, Cleaning cloths | Main or Lower shelf |
| Service Zone | Mugs, Spoons, Syrups, Napkins | Upper shelves |
Safety and Maintenance: Protecting Your Home
A coffee bar involves three elements that can be hazardous: heat, moisture, and electricity.
Electrical Safety and Circuit Verification
A typical coffee station might power a grinder, an espresso machine, and a milk frother simultaneously.
- Circuit Load: Most kitchen circuits are 15 or 20 amps. A high-end espresso machine can draw 1200W–1500W alone. How to Verify: To avoid tripping breakers, identify which outlets are on the same circuit by switching off breakers one by one at your service panel. Avoid running your coffee machine and a microwave on the same circuit simultaneously.
- GFCI Protection: Per the National Electrical Code (NEC), kitchen outlets near water sources should be GFCI-protected. If your bakers rack has a built-in power strip, ensure it is high-quality and includes surge protection.
- Cable Routing: Avoid "daisy-chaining" power strips. Use adhesive cable clips to keep cords away from heat sources and water spills.
Moisture Protection
Steam from espresso machines and accidental spills can damage wood or cause metal to rust.
- Sealants: For wood-topped racks, apply a food-safe polyurethane or wax sealant to create a water-resistant barrier.
- Silicone Mats: Place a heat-resistant silicone mat under your espresso machine. This protects the surface from heat rings and catches drips.
- Rust Prevention: If using a metal rack, wipe down the frame weekly with a dry cloth to prevent mineral deposits from steam.
Smart Integration: The 2026 Coffee Bar Experience
As we move through 2026, the "smart coffee bar" has become a standard feature in modern apartments.
- Smart Plugs: Use smart plugs to schedule your espresso machine to preheat. Critical: Ensure the smart plug is rated for the high wattage of heating appliances (typically 1500W/15A or higher). Check the sticker on the bottom of your appliance for its "Max Watts" or "Amps" rating.
- IoT Scales and Grinders: Modern grinders often sync with apps to track bean usage. Ensure your rack has a dedicated spot for a tablet holder.
- Ambient Lighting: LED strips with motion sensors can illuminate your workspace early in the morning. Many Bestier racks now include integrated LED options controlled via smartphone.
Appendix: Quick Measurement & Verification Guide
Before finalizing your setup, perform these three quick checks:
- The Clearance Test: Measure the height of your espresso machine with the lid open. Add 4 inches. This is your minimum required shelf spacing to prevent steam damage to the shelf above.
- The Stability Check: Once assembled, gently nudge the rack from the side. If it sways, tighten all bolts and adjust the leveling feet. If it still sways, you must use an anti-tip wall anchor.
- The Power Audit: Add up the wattage of your three most-used appliances (e.g., Espresso Machine 1500W + Grinder 200W = 1700W). If this exceeds 1800W on a standard 15A circuit, do not run them at the same time.
FAQ
Can I use a regular bakers rack for a heavy espresso machine? Yes, provided you check the static weight capacity. Most industrial-grade racks support 50–100 lbs per shelf (typical for steel/composite builds). Always place the machine on the most stable, reinforced shelf (usually the main workspace).
How do I prevent my bakers rack from wobbling when I use the grinder? Wobbling is often caused by uneven flooring. Use the adjustable leveling feet found on most modern racks. For high-torque grinders, placing a non-slip rubber mat under the grinder can also absorb vibrations.
Is it safe to put a coffee maker under the upper shelves of a bakers rack? It is safe as long as there is sufficient clearance (aim for 6 inches) for steam. Steam can cause wood to warp over time; consider applying a moisture-resistant film to the underside of the shelf directly above.
How can I hide the messy cords on my coffee bar? Use split-sleeve cable tubing or adhesive J-channels along the back of the rack's frame. Many complete coffee bar cabinet collection items now feature integrated cord ports.
Do I need to anchor my bakers rack to the wall in a rental? Safety should be the priority. If drilling is strictly prohibited, look for a rack with a wider, weighted base, or use heavy-duty adhesive furniture straps that minimize wall damage while providing essential tip-over protection.
Safety Disclaimer: This guide is for informational purposes only. Electrical installations and furniture anchoring should be performed in accordance with local building codes and manufacturer instructions. Always consult a licensed electrician for circuit load assessments or if you are unsure about your home's wiring capacity. The author and publisher are not liable for any injury or property damage resulting from the use of this information.
References
Government / Standards / Regulators
- CPSC Adopts Final Consumer Product Safety Standard to Prevent Tip-Overs
- CPSC Warning on Defective Tip Restraints
Platform Official Docs & Policies
Industry Associations / Research Institutes
- Best Bakers Rack Microwave Stands for Kitchen Organization
- Yaheetech 6-Tier Kitchen Bakers Rack Review