


Summary
Upgrading or replacing LED strips on a gaming desk involves matching voltage specifications (typically 5V, 12V, or 24V), selecting between high-density COB or traditional SMD LEDs, and ensuring compatibility with modern smart home protocols like Matter and Thread. By 2026 standards, a successful installation requires careful adhesive removal using controlled heat and a power budget calculation to avoid overloading USB ports or integrated controllers.
Key takeaways
- Voltage Matching is Critical: Never mix 5V ARGB components with 12V or 24V systems, as this can cause immediate hardware failure or fire hazards.
- COB vs. SMD: Chip-on-Board (COB) LEDs provide a seamless "neon" glow without visible hotspots, making them the preferred choice for 2026 premium upgrades.
- Power Limits: Standard USB 3.0 ports are limited to 4.5W; high-brightness upgrades often require dedicated wall adapters or USB-C Power Delivery (PD) sources.
- Smart Integration: Ensure new controllers support the Matter protocol for seamless synchronization with ecosystems like Razer Chroma, Alexa, and Apple Home.
- Surface Prep: Use a heat gun at low settings (60-80°C) rather than harsh chemicals to remove old strips without damaging the desk’s protective finish.
Identifying the Need for an LED Upgrade or Repair
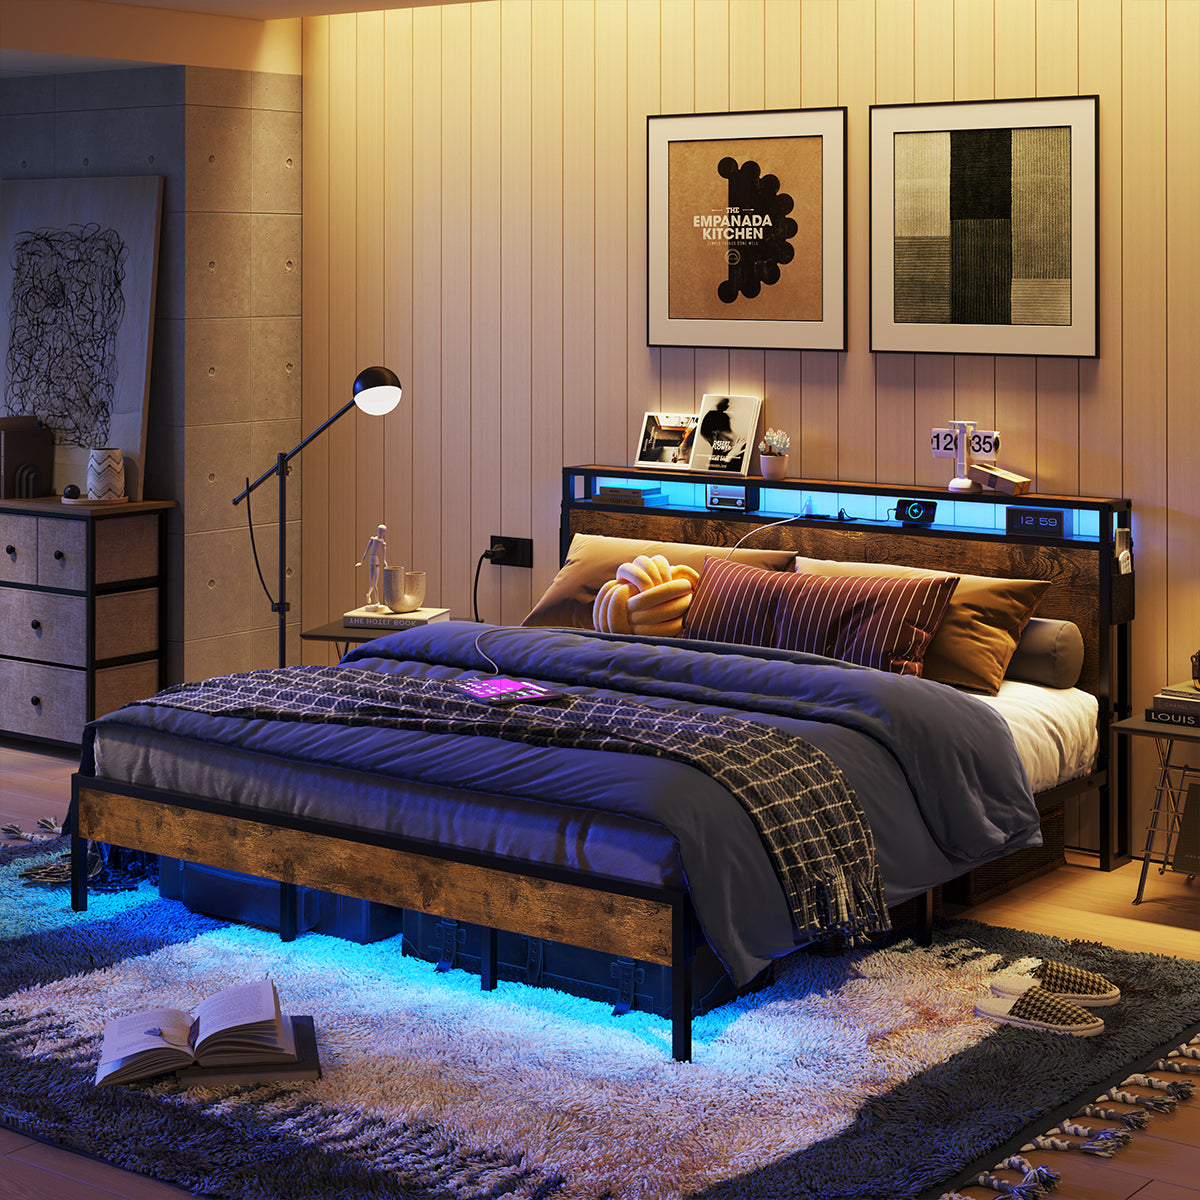
Integrated lighting is a cornerstone of the modern gaming aesthetic, but even the most robust systems can eventually require attention. Common failure points include flickering caused by loose solder joints, "dead zones" where a section of the strip remains dark due to physical stress, or a complete loss of signal from a failed controller. Beyond simple repairs, many users choose to upgrade their factory-installed lights to achieve higher brightness levels or better color accuracy.
When evaluating your current setup, check the physical integrity of the strip. Gaming desks often experience vibration and movement, which can fatigue the thin copper traces within the LED tape. If your lights are functioning but appear dim or "spotty," you are likely dealing with older SMD (Surface Mounted Device) technology. Upgrading to modern COB (Chip-on-Board) strips can eliminate these hotspots, providing a continuous line of light that enhances the overall Bestier LED Gaming Desk experience.
Logic Summary: This guide assumes you are working with low-voltage DC systems (5V-24V). While many principles apply to all LED furniture, always consult your specific desk's manual for integrated power limits. These recommendations prioritize long-term stability over maximum possible brightness.
Technical Specifications: Navigating the 2026 LED Landscape
The LED market in 2026 has diverged into two primary technologies: SMD and COB. Traditional SMD strips (like the 5050 or 2835 chips) are affordable and reliable but often produce visible "dots" of light. In contrast, COB strips use a dense array of tiny LED chips covered by a phosphor layer, creating a uniform glow. For edge-lighting a desk, COB is significantly superior as it prevents distracting reflections on monitors and peripherals.
Voltage selection is the most common area for errors. Most integrated desk lights operate on 5V (Addressable RGB or ARGB) or 12V. However, high-end 2026 setups are increasingly moving toward 24V systems. Higher voltage allows for longer runs with less "voltage drop"—the phenomenon where LEDs at the end of a strip appear dimmer than those at the start. When replacing a strip, you must match the voltage of your existing controller or replace the entire system (strip, controller, and power supply) as a matched set.
3-Pin ARGB vs. 4-Pin RGB
- 3-Pin (5V) ARGB: Allows for "rainbow" effects and individual control of every LED. This is the standard for modern PC-synced setups.
- 4-Pin (12V) RGB: The entire strip changes to one color at a time. While simpler, it lacks the dynamic movement found in premium gaming environments.
Power Management: USB vs. Dedicated Wall Adapters
A frequent mistake during upgrades is underestimating the power draw of high-density LED strips. A standard USB 2.0 port provides only 2.5W (5V/0.5A), while USB 3.0 provides 4.5W. A high-performance 2-meter COB strip can easily pull 15W to 20W at full brightness. Attempting to power such a strip from a standard motherboard USB port can lead to port failure or system instability.
For any significant upgrade, we recommend using a dedicated wall adapter or a controller that supports USB-C Power Delivery (PD). This ensures the LEDs receive consistent current, preventing the flickering often associated with under-powered setups. If you are integrating multiple lighting zones, consider 5 Cable Management Hacks for LED Gaming Desks to keep the additional power bricks and wiring organized and out of sight.
Step-by-Step Guide to Replacing Your Gaming Desk LED Strips
Replacing the lights is a straightforward process, but it requires patience during the removal phase to protect the desk surface.
1. Safe Removal of the Old Strip
Avoid using high-percentage isopropyl alcohol immediately, as it can occasionally cloud certain finishes or weaken the structural adhesives used in the desk's construction. Instead, use a heat gun or a hair dryer on a low setting to warm the adhesive. Once softened, gently peel the strip back at a 45-degree angle. If residue remains, a citrus-based adhesive remover is a safer alternative for most engineered wood products.
2. Surface Preparation
The longevity of your new upgrade depends entirely on the bond between the adhesive and the desk. Clean the mounting area with a damp cloth and a mild detergent, followed by a quick wipe with a low-concentration alcohol pad to remove oils. Ensure the surface is completely dry before proceeding.
3. Installation and Cornering
When applying the new strip, avoid sharp 90-degree bends, which can crack the internal circuitry. Use "L-shape" clip connectors or create a small "ribbon loop" at the corners to relieve tension. If your desk has a complex layout, you might need a new LED Remote Control or a specialized controller to manage multiple segments.
| Step | Action | Tool Required | Why It Matters |
|---|---|---|---|
| 1 | Test Strip | Power Supply | Verify no DOA segments before sticking. |
| 2 | Heat & Peel | Heat Gun / Hair Dryer | Prevents damage to the desk finish. |
| 3 | Clean Surface | Microfiber + Cleaner | Ensures the new adhesive lasts for years. |
| 4 | Apply Strip | Scissors (at cut marks) | Proper alignment prevents light leakage. |
| 5 | Secure Wiring | Cable Clips | Prevents the strip from sagging over time. |
Integrating with 2026 Smart Home Standards (Matter & Thread)
The biggest shift in 2026 is the universal adoption of Matter and Thread. When choosing a replacement controller, look for these logos. Matter-compatible controllers allow your desk lights to talk directly to your smart home hub without proprietary bridges. This means you can easily Sync Your Desk RGB Lighting with Your Gaming PC and other peripherals from different brands.
Thread support is equally important for low-latency gaming. Unlike Wi-Fi, which can become congested, Thread creates a mesh network specifically for smart devices, ensuring your lighting effects react instantly to in-game events or voice commands. If you use Razer Chroma or Philips Hue, check out our guide on how to Sync Bestier LED Furniture with Govee & Philips Hue for a unified room aesthetic.
Maintenance and Longevity for Integrated Desk Electronics
To ensure your new upgrade lasts, avoid placing heavy objects directly on the LED strips. Heat is the primary enemy of LED longevity; if your strip feels hot to the touch, it is likely being overdriven or lacks adequate ventilation. High-quality gaming desks are designed with safety in mind, often using materials that meet strict environmental standards. For more on the materials used in your setup, see our Engineered Wood Safety Guide, which details how CARB Phase 2 and EPA TSCA Title VI standards ensure your indoor air quality remains safe even as electronics generate heat.
Regularly check your connections for signs of oxidation or loosening. If you notice a color shift toward yellow or red at the end of a long run, this is a sign of voltage drop. In such cases, injecting power at both ends of the strip or upgrading to a 24V system can resolve the issue. For those looking to expand their setup further, Syncing Bestier with Razer Chroma & Alexa provides a robust framework for managing complex, multi-device lighting environments.

FAQ
Can I use any LED strip to replace the ones on my Bestier desk? You can use most third-party LED strips, provided you match the voltage (usually 5V or 12V) and the connector type (3-pin ARGB or 4-pin RGB). However, using a strip with a significantly higher power draw than the original may require an external power adapter rather than the built-in USB port. Always check the wattage rating of your desk's integrated controller before connecting a high-density upgrade.
How do I know if my LED strip is 5V or 12V? The voltage is almost always printed directly on the LED strip next to the copper "cut points" (look for +5V, +12V, or +24V markings). If the markings are illegible, you can use a multimeter to measure the output from the controller while it is powered on. Connecting a 5V strip to a 12V controller will result in immediate failure and potential smoke, so verification is essential.
Is it better to solder connections or use clip connectors? Soldering provides the most reliable and low-profile connection, which is ideal for gaming desks that might be moved or adjusted. However, modern solderless clip connectors are much easier for beginners and provide a secure enough connection for most home setups. If you choose clips, ensure they are rated for the width of your strip (typically 8mm or 10mm) and the number of pins required.
Why are my new LED lights flickering? Flickering is usually a sign of insufficient power or a loose connection. If the flickering happens at high brightness or when displaying white (which uses the most power), your power supply likely cannot handle the current draw. Try reducing the brightness or switching to a higher-wattage power adapter. If only one section flickers, check for a loose connector or a kink in the strip.
Can I cut LED strips to fit my desk? Yes, LED strips are designed to be cut, but only at specific marked intervals, usually indicated by a line and copper pads. Cutting anywhere else will break the circuit and cause the remaining section of the strip to fail. After cutting, you can use a connector to join the strip to a power source or another segment of lights.
Will upgrading my LEDs void my desk warranty? In many cases, replacing integrated electronics with third-party components may void the electrical portion of your warranty. However, since LED strips are often considered wear-and-tear items, many manufacturers provide replacement parts. It is always best to check the specific warranty terms for your desk model before making permanent modifications like soldering or drilling.
